Getting started
A new year, new colleagues and new projects on the horizon! These are very exciting moments and there is a lot of positive energy, but it is also very time consuming, which is totally fine since we are creating the things we preach. As the saying goes "Practise what you preach," which is Microsoft and especially Azure Cloud!
Something I'm working on right now is creating an Azure static Web app with Azure DevOps GIT as backend. You might wonder why. GIT becomes and more important for engineers for source control in everyday workflows, and Azure Static Web Apps gives your website a big boost since it is just HTML, CSS and Javascript. Combining this would be great and just building something when something new needs to be released to the website is very efficient. It also ensures you don't have to worry about security much compared to working with Wordpress, etc.
While I'm working on this, my colleague Jordan is writing the code for the new website in Svelte (cybernetically enhanced Javascript) and Netlify CMS (GIT based backend), which will be amazing when it is done.
This blog will be a series in which I take you on our journey.
Azure Static Web App
An Azure Static Web App is a free to use web service which can be compared to Github pages, but also has a premium option, allowing for Private endpoints, bring your own Azure Functions, Managed Identity, more custom domains, etc. All content within an Azure Static Web app will be distributed world-wide like with an Azure CDN for optimal performance.
You can create your web app or website with different frameworks such a Angular, React, Svlete, Vue or Blazor. But you can also use Hugo, Gatsby and VuePress or plain HTML, CSS and Javascript.
Every time something changes in your GIT branch, the DevOps pipeline will run and through the CI/CD, your web app/website will build your new changes and deploy them to your Azure Static Web App.
While this is great for everything that can be statically built, you might also have some dynamic content. You can integrate this via Azure Functions, which are by default managed within your Azure Static Web App. Azure Functions are server-less by nature and only run when requested, but can nowadays also be made durable to run continuously.
In these Azure Functions you can make API calls to everything you need, such as an Azure SQL Database or even things outside of Azure. This adds a lot of options to what you can accomplish with the service.
Now let's have a look, shall we?
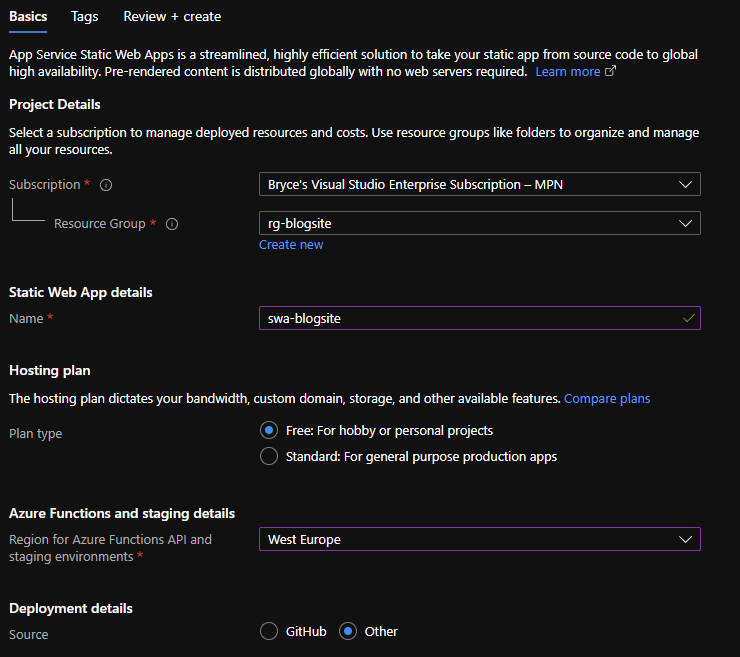
Well, this is it. It's very easy to configure within the portal. You can choose you plan, location for API's and how you would like to deploy. If you choose GitHub, you will be asked which framework you use and to log into GitHub itself. It will then auto configure everything you need in order to deploy your web app/website. But that ain't fun, is it?
So let's go with the other option and figure it out from the Azure DevOps side.

When your Azure Static Web App has been deployed in Azure, go to your resource and you will see a manage deployment token. If you click on it, it should show you something like this:

This token will be needed when configuring Azure DevOps.
Azure DevOps
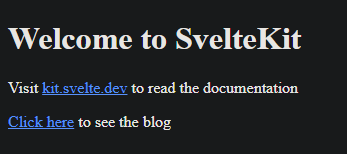
First things first: in Azure DevOps we are going to need a Repo containing something that will represent this project. Luckily there is such a project on GitHub, which you can import. I will use this as well for this example.
NOTE: in order to get this to work properly with Azure Pipelines, you need to add the following to the package.json file
"engines": {
        "node": "16.13.1",
        "npm": "^8.1.2"
  },
When you've got the repo imported, we will need to write a YAML to be able to deploy it. Click on the blue button called Set up build or navigate to Pipelines and click on New Pipeline.
Choose the following options: Azure Repos GIT > {Your Imported Repo Name} > Starter pipeline.
Remove everything from the starter and paste the following YAML code:
trigger:
- master

pool:
  vmImage: ubuntu-latest

stages:
- stage: Deploy
  jobs:
  - job:
    displayName: Deloy
    steps:
    - task: AzureStaticWebApp@0
      inputs:
        app_location: '/'
        output_location: 'build'
        azure_static_web_apps_api_token: '$(DeploymentToken)'
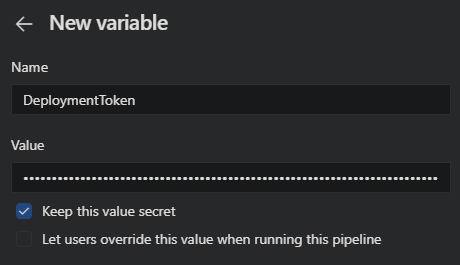
As you can see, we use a Variable called DeploymentToken. Click on Variables and on New variable. Call the variable DeploymentToken and paste the Deployment token from the Azure Portal as value. Check the Keep this a secret box to hash it. Click on OK and hit Save to finalize it.

Click on Save and run and watch you content getting published!

What's next?
I'll leave it here for now. Next week let's look at how we can actually post a blog and what we need to do to be able to do that.

