Previously
Last week I enjoyed a nice week off to spend with the family and relax for a bit and now I'm back at it! In my previous blog I showed how to build a Logic App solution to archive your logs from Log Analytics, to continue with such solutions, this weeks blog will all about making exports from Azure SQL Databases via Azure Logic Apps. While Azure SQL Databases have their own backup mechanics, it is sometimes required to also have other solutions in place to make backups and store them for a longer period of time or to be able to restore them outside of the cloud.
Let's look on how we could achieve this!
Configurations
As always there are some steps required to do before the Azure Logic App can do its magic. In this case we will be needing a few services such as an Azure SQL Server with Azure SQL Database, Azure Storage Account, Azure KeyVault and of course a new Azure Logic App to work with. For now I will assume that all these services are in place and address the required configurations.
Azure KeyVault
Within the KeyVault we will need at least two secrets, the login for the SQL Admin account (This can also be a AD-based Service Account) and a StorageAccessKey (This can also be a SAS key if needed).

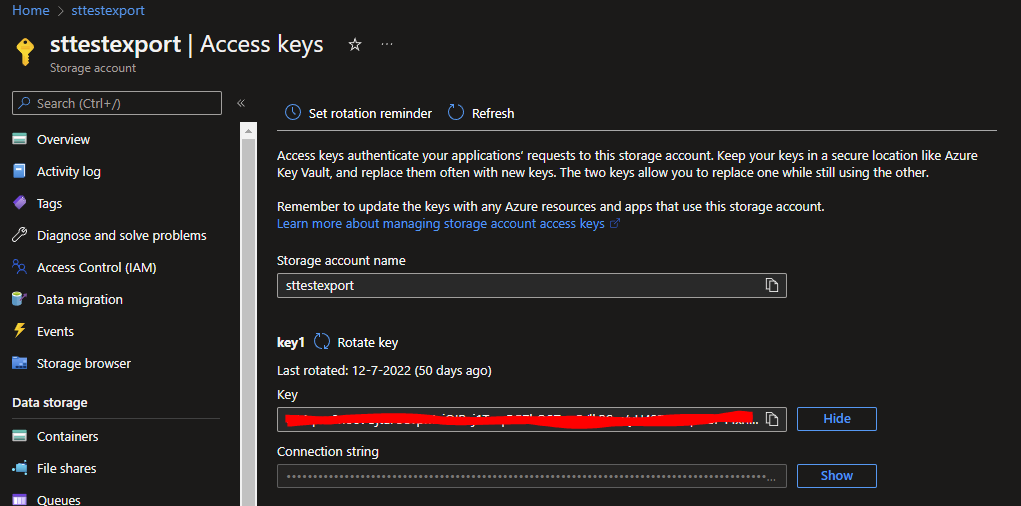
For the SQL Admin Secret, I used the username of the account as Secret name to make it easier to find and use within the Logic App itself. For the AccessKey I went into my Storage Account to the Access Keys tab and stored my Key1 value in the KeyVault.
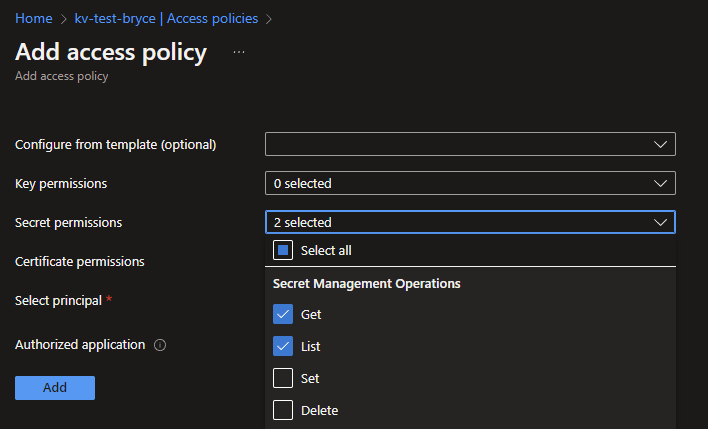
Now that the secrets have been set, also some access to the KeyVault would be nice! This can be done by going to the Access policies tab and clicking on the + Add new Access Policy. You can use a template if you like, but the most important you will need is the GET and LIST option underneath the Secret permissions. Select these 2 options.
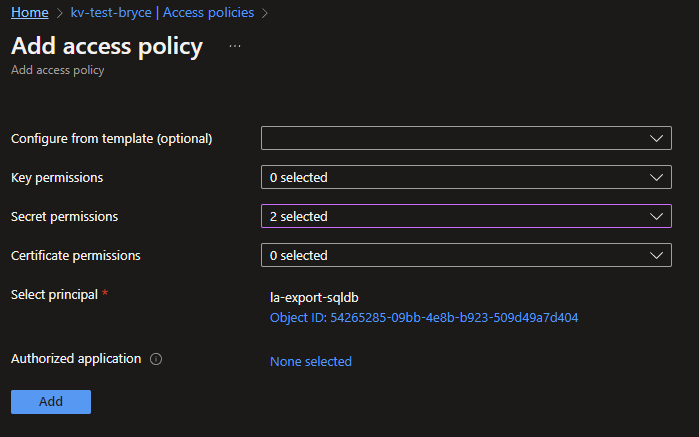
To finish the Access Policy you will need to select the MSI of the Azure Logic App. If you don't know how to enable the MSI, you can find it in this blog.
Click next to Select principal and search for your newly created Logic Apps name. When found and select, click the Save button.
Continue by clicking on the Add and Save button to finalise your configured Access Policy.
Azure SQL Server
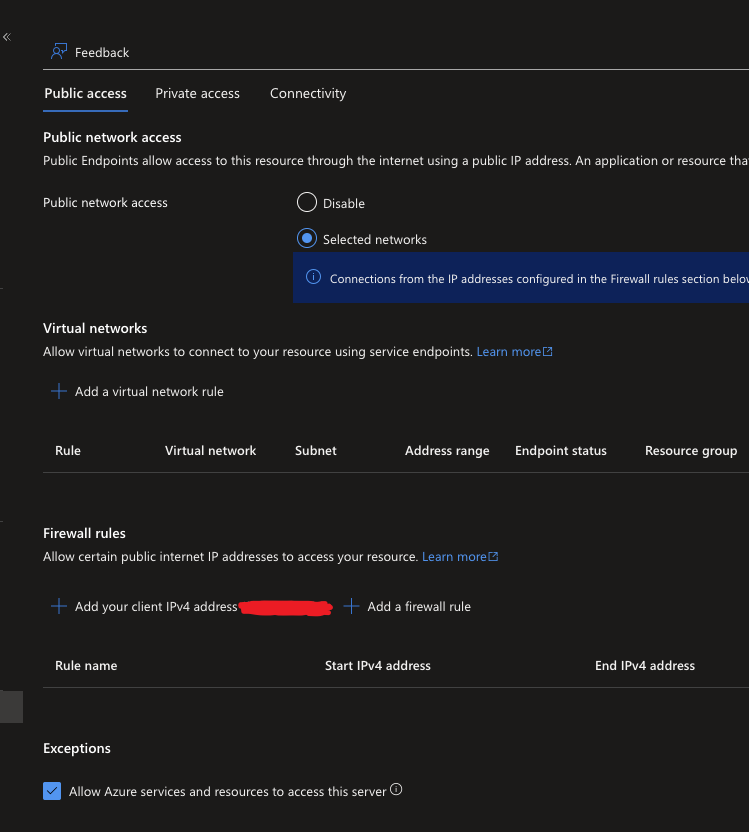
Now having access to the KeyVault, the Logic App still needs some additional settings to function. Go to your Azure SQL Server and click on the Networking tab underneath the Security category.
In the Public Access tab for Networking you will see the option called: Public network access, by default it is set to Disable, which means no public access is allowed. But for the API call we will need to be making within our Azure Logic App, it needs to be enabled by setting it to Selected networks and checking the Allow Azure services and resources to access this service underneath Expections. If this isn't set you will receive the following error: An unexpected error was returned by the SQL engine while preparing the operation inputs. Error: 47073, State: 1.
With the networking configured for the Azure SQL Server, the Logic App will still need access to the resource itself, to allow exports to be made. For this we need to set the RBAC for the service. If you don't know how to do this, you can see how in this blog. The SQL DB Contributor role would be good enough to allow the Logic App to call the SQL API for an export.
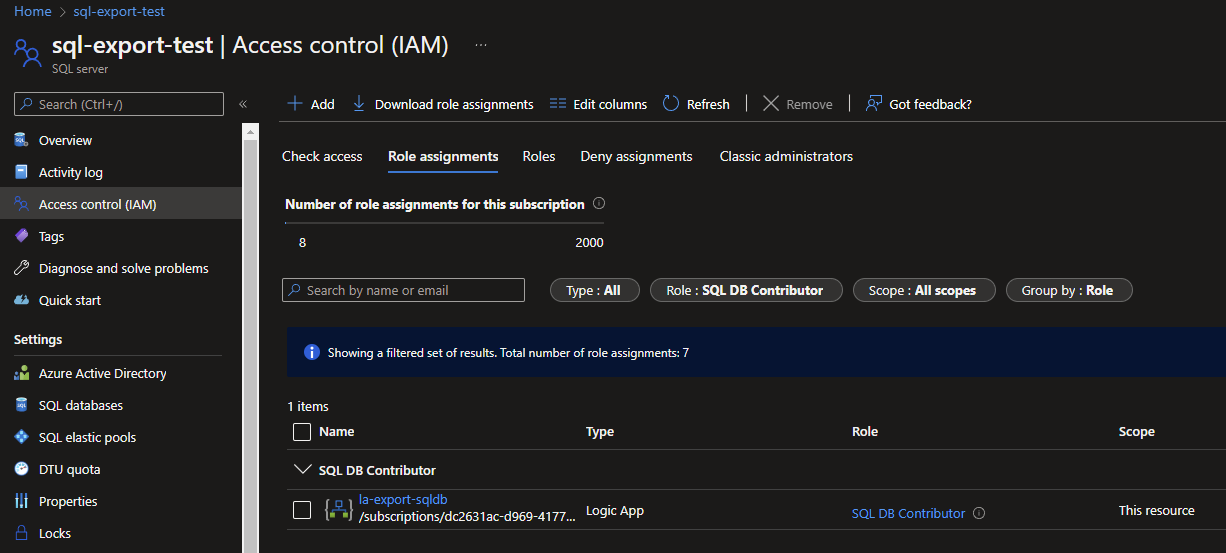
Azure Storage Account
Repeat the previous step for the RBAC, but now for your Azure Storage Account and with the Storage Blob Data Contributor role for your Logic App.
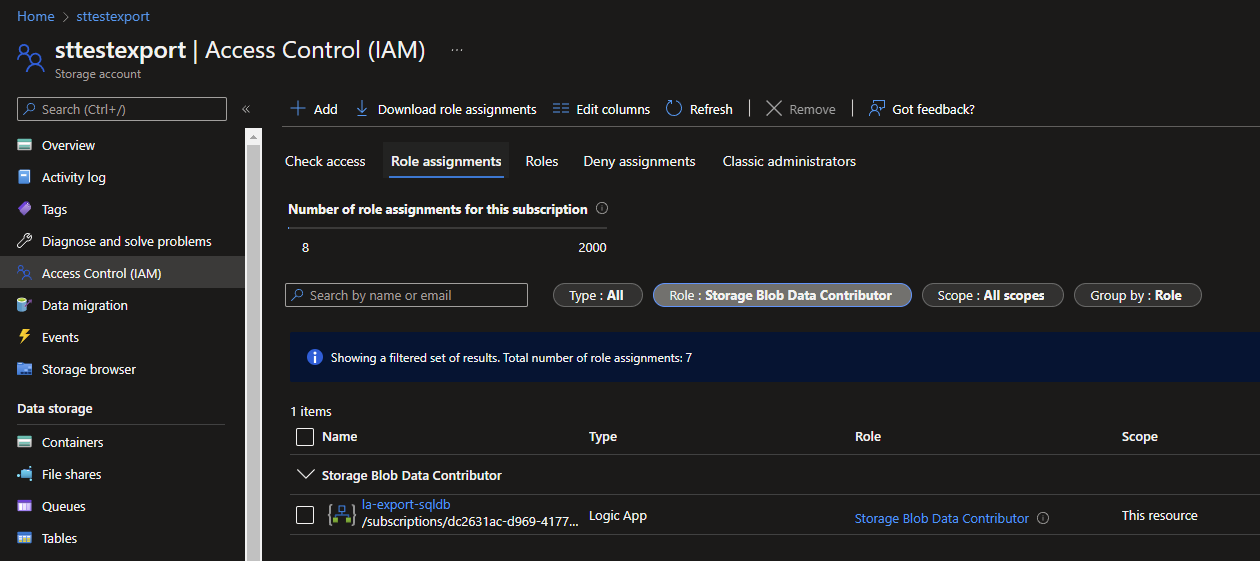
With everything configured, we can now start to look at how the Logic App itself will need to be build!
The Logic App
The Logic App itself is a short one, which also makes clear and easy to work with. The Logic App will be triggered on a certain time, a variable will be set (which is just for convience purposes), the secrets for both the Login and the AccessKey will be gathered and an API call will be able to the Azure SQL Database to initiate an Export to your Azure Storage Account.
In short the end results would look like this:

As stated we need our trigger first. Search for the Schedule connector and select the recurrence trigger. Set the interval to your needs, in my example this will be 1 day.
Click on the Add new parameter and select the Time zone, At these hours and At these minutes options. I'm from the Netherlands, so I set it to my local Time zone and since I want the Logic App to trigger each night at 12 AM (00:00) I set both the At these hours and At these minutes parameters to 0.

In my example my Azure SQL Server and Azure SQL Database use the Microsoft naming conventions to some sorts, meaning my SQL Server starts with sql and my Database with sqldb. The rest of the naming is similar with the use of -export-test for example purposes.
Since both the Server as the Database naming is needed for the API call later on, I opted for a variable. To use a similarly, create a new action and search for the Variables connector and choose the Initialize variable action.
Give your variable a new, set it to a string and add the name of your Database as Value.

Next up will be the Secrets from the KeyVault. To get these, create 2 actions in paralell of each other and search in both for the Azure KeyVault connector with the Get secret action.
You will be asked to setup a connection first. Click on the Managed Identity option and add the connection name and Vault name, which is the name of your KeyVault service.
When filled in, click on Create and the connector will be ready to be configured.
NOTE: If the connection will not be recognized for both connectors at once when configured. Remove the action that still requests a connection and add it again.
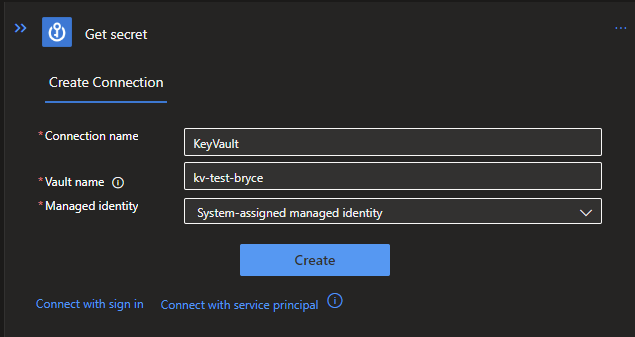
Search in both KeyVault actions for the Secrets you need. One for the Login and the other for the AccessKey.

Since we are dealing with Secrets we don't want to make them visible in our Run history and Outputs. To keep them safe, right click on the connectors and select the Settings option. Enable both the Secure Inputs and Outputs option for both KeyVault actions.

Last but not least, we will need to make our API Call. This we can do my creating a new acction and searching for the HTTP Connector and selecting the HTTP request action.
Configure the HTTP request as followed:
Method: POST
URI: https://management.azure.com/subscriptions/dc2631ac-d969-4177-a85e-08d519fae037/resourceGroups/rg-blog/providers/Microsoft.Sql/servers/@{replace(variables('DatabaseName'),'db','')}/databases/@{variables('DatabaseName')}/export?api-version=2021-11-01
Header: Content-Type | application/json
Body:
{
  "administratorLogin": "@{body('Get_login_credentials')?['name']}",
  "administratorLoginPassword": "@{body('Get_login_credentials')?['value']}",
  "authenticationType": "Sql",
  "storageKey": "@{body('Get_storagekey')?['value']}",
  "storageKeyType": "StorageAccessKey",
  "storageUri": "https://sttestexport.blob.core.windows.net/backups/@{variables('DatabaseName')}_@{utcNow()}.bacpac"
}
Click on the Add new parameter and select Authentication.
Authentication type: Managed identity
Managed identity: System-assigned managed identity
NOTE: authenticationType can also be set to ADPassword, to use AD-based login, for example for a Service Account. storageKeyType can also be set to SharedAccessKey to use a SASkey if needed.
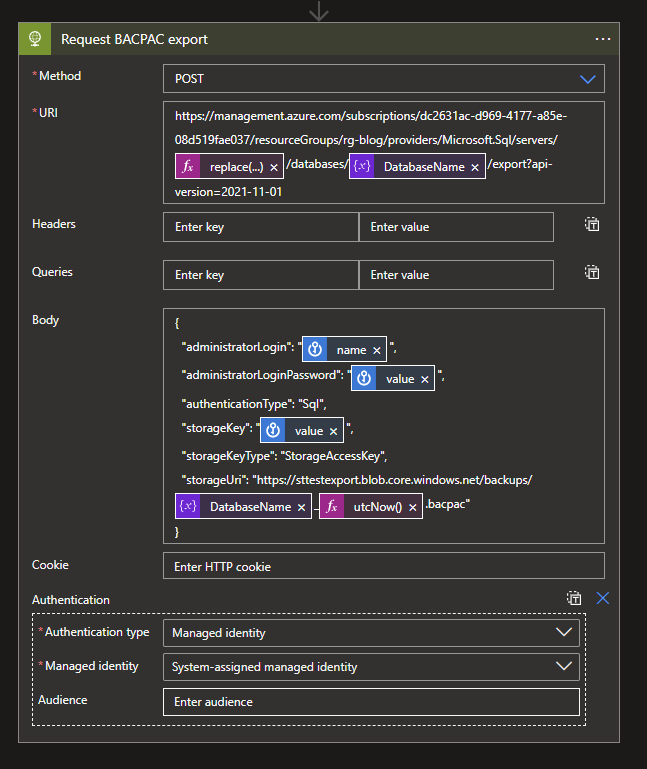
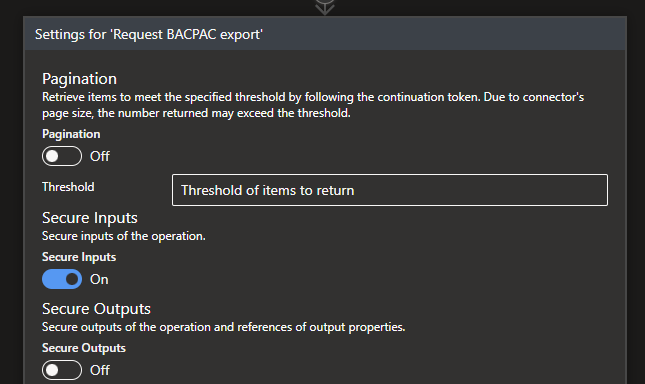
Since we are also using the results from the KeyVault actions in here, we will need to enable the Secure Inputs option to not have our secrets exposed.
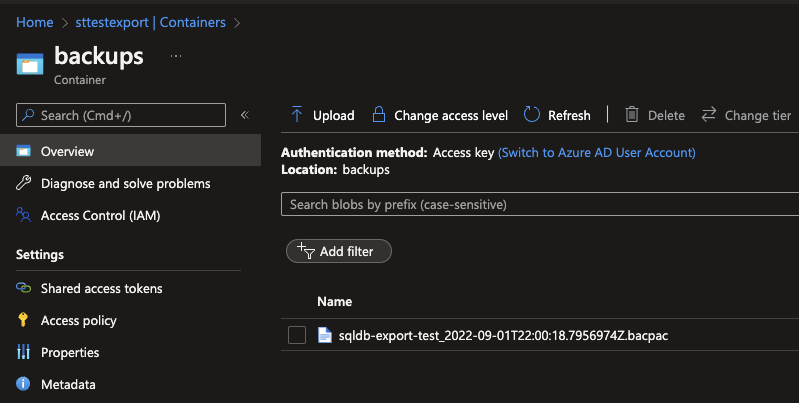
With the flow completed, you can start running your Logic App. Depending on the size of your Database it might take some time to Export it, but eventually it should have placed the .BACPAC in your Azure Storage Account!
What's next?
In past solutions I have often used HTTP connectors instead of the regular connectors for certain services, such as Microsoft 365 based connectors. Stay tuned for next weeks blog, in which I will deep dive when to use which for certain scenarios.

