

Previously
In last weeks blog, I showed you how to perform an SQL Bulk insert manually step by step, as was requested. This week let's have a look at the recommended way of doing it, with the Azure Data Factory. If you haven't got an environment to work with yet, follow last weeks blog step by step and you will be good to go.
##Azure Data Factory for private networking If you have the environment as showed last week, or something similar, you will only need to add an Azure Data Factory (ADF), or if you already have one you should be good to go.
If you don't have one, create an ADF. For now, giving it a proper name should be fine. Within the GIT configuration tab, check the box for Configure Git later and continue to Review + create and hit Create.
Due to the fact that we are still working with private networking we can't simply connect to the Azure Storage Account and Azure SQL Database. Before we can do this, we need to create a new Integration Runtime (IR).
Go to the ADF and click on Open Azure Data Factory Studio. ADF will open and the main menu will appear.
Click on the Toolbox icon (manage).

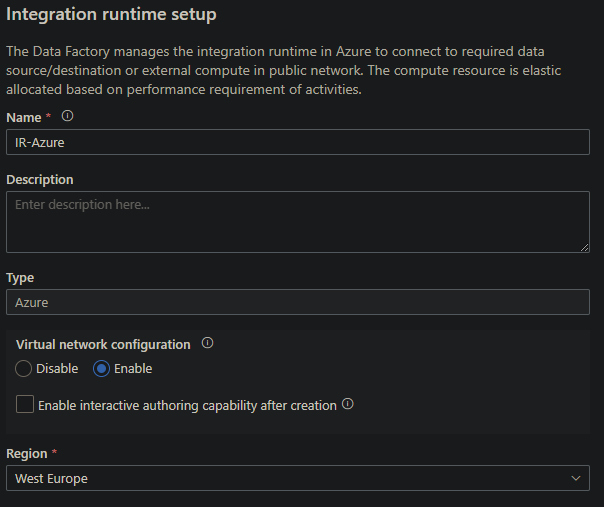
Go to the Integration runtimes Tab and click on +New. Select Azure, Self-Hosted then select Azure. Give it a proper name and check the Enable box underneath Virtual network configuration option. Since we might want to test our connection, also check the box at Enable interactive authoring capability after creation. To finalize the creation of the IR click on Create.
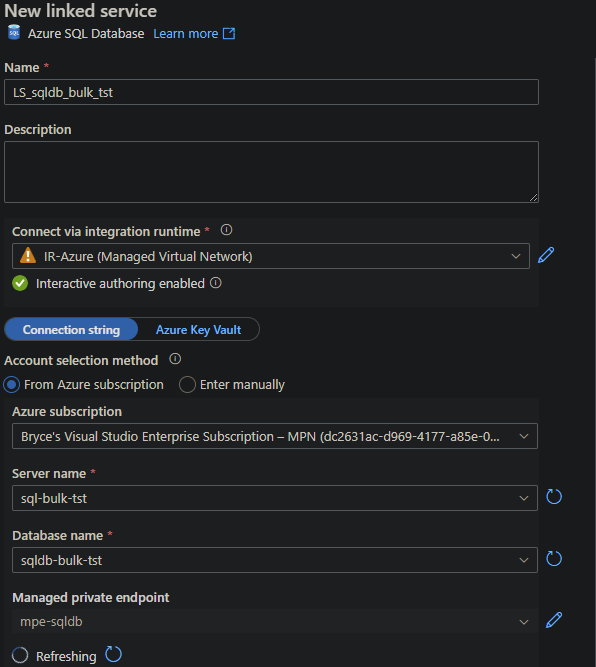
Now we can start making linked services in order to do the Bulk Insert. Go to the Linked Services Tab and click on +New. Search for Azure SQL Database option, and click on it.
Select the IR you've just created. You will see a Managed private endpoint option appear underneath the database name. Click on it to configure it for the Azure SQL database.
When you submit the creation it will show the Status Pending. Open a new tab and go to your Azure SQL Server and to the Private endpoint connections tab. You will see the new endpoint waiting for approval.
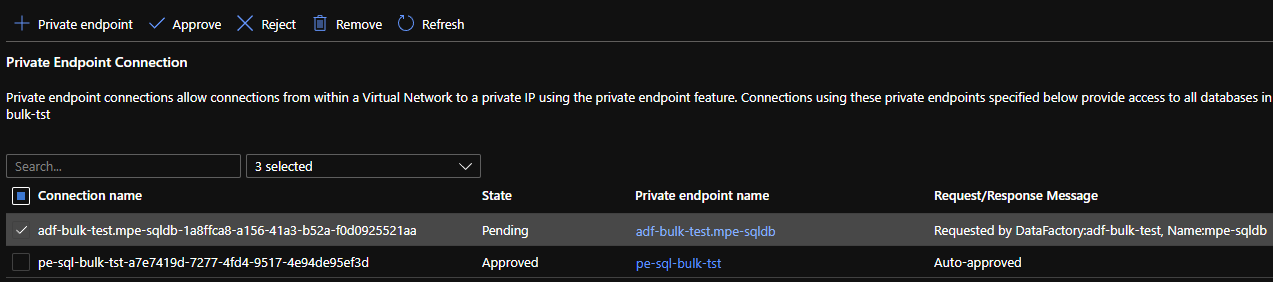
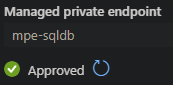
Approve it and go back to the ADF. Fill out the other information required, depending on Authetication type. After a few minutes the approval of the new endpoint will reach ADF as well and you should see a green checkmark.
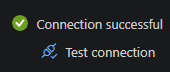
Test you connection if you want, but it should work.
Repeat these steps but instead for the Azure Blob Storage instead of for an Azure SQL Database.

Datasets and pipelines
Now that the connections have been set up, we can move towards making the pipeline to move our data.
Click on the Pencil (Author).

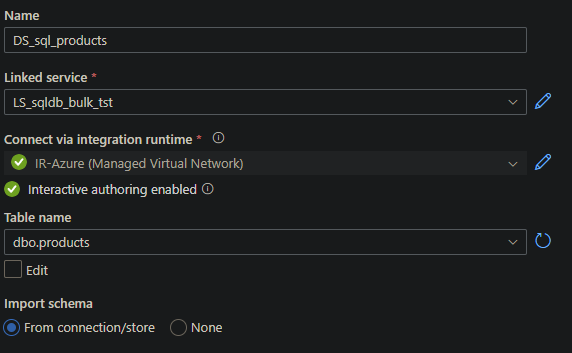
Click on Datasets and click again on the ... and select New Dataset. Search for the Azure SQL Database option, and click on it. Give the Dataset a proper name and select your linked service. Continue by selecting the dbo.products table and finalize it by clicking OK.
Repeat these steps, but for the Azure Blob storage instead of for an Azure SQL Database, and choose a DelimitedText format.
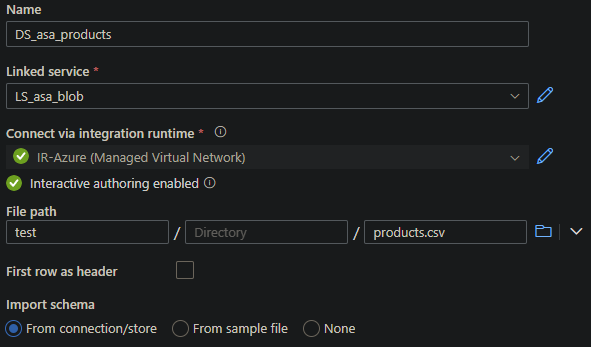
Depending on how the delimiter has been set due to language options or how your .CSV was created, check via Preview data if the data look correct, otherwise change the Column delimiter from ' , ' to ' ; ' as was the case for me.
Click on Pipeline and click again on the ... and select New Pipeline. Continue by giving the pipeline a proper name and click on the Move & Transform Category. Drag & drop the Copy Data component onto the canvas.
Click on the Copy Data component on the canvas and go to the Source Tab. Select your Azure Storage Account Dataset.

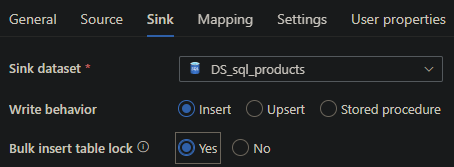
Move to the Target Tab and select your Azure SQL Database Dataset and select Yes at the Bulk Insert table lock option.
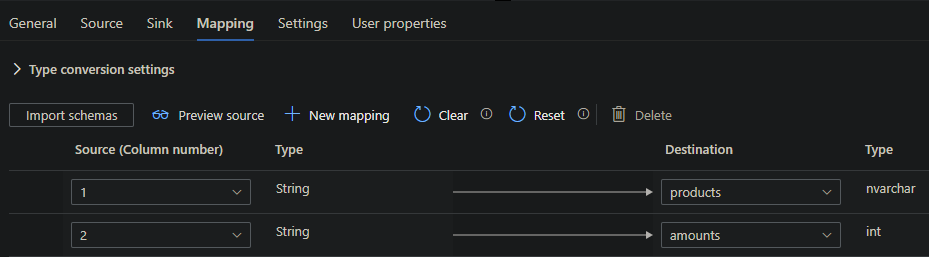
If you didn't specify any column headers in your .CSV, as I did, you will need to set a mapping, otherwise the data can't be moved.
Go to the Mapping Tab and click on import schemas. The base mapping should be fine to use.
We are all set now, let's hit that Publish All button to save everything first to be sure. After this, you can hit the Debug button.
It will now run and move the data via a private network through the ADF. Now we can automatize this further if needed and repeat the process multiple times.
What's next?
It is a few hours before the new year and 2022 will be a very exciting time! Four new colleagues will join us with whom we can build new Azure solutions! Stay tuned for next week when we start our new projects. Happy New year to all readers and catch you next year!